Showing posts with label cheese. Show all posts

Sunday, May 26, 2013

Chicken Taco Casserole

So I haven't posted any new recipes in the last month. It's been quite busy at work so I've been sticking to the staples and not taking the time to experiment and come up with something new. My creative juices were itching to get out this afternoon, and with it being a lazy Sunday, I had ample time to dream up a new dish. I started as I usually do: with a vague idea of what I want to create. Then I google and see what's already out in the world, and based on my own image of the dish and what others have created, I start my work.

I'm calling this dish a chicken taco casserole, since it contains most of the ingredients in a taco but in casserole form. I wouldn't call it a Mexican dish, however, as I gave it my own spin. I'm personally not a fan of very spicy food, and my cupboard is much more full of herbs than it is of spices. My go-to spice for a little heat and smokiness is paprika, so that's what I layered into this dish to give it a slight kick.

Chicken Taco Casserole


¼ onion, diced
1 clove garlic, minced
½ orange sweet pepper, diced
½ green sweet pepper, diced
5 cremini mushrooms, cut into eighths
1 cup spinach
2 tsp olive oil
1 tbsp paprika paste
1-2 chicken breasts, pounded flat, seasoned with salt, pepper, garlic powder, paprika
1 cup sour cream
¼ cup cream cheese
1 tsp paprika paste
1 tsp parsley flakes
2 whole grain tortillas, ripped into pieces
1 ½ cups salsa
1 cup grated cheese
15 grape tomatoes, halved


Preheat oven to 350oF. In a large skillet, heat 1 tsp olive oil over medium-high heat. Add the onion, garlic, peppers, and mushrooms. Season with salt, pepper, and 1 tsp paprika, and sauté for 5 minutes. Add the spinach and stir until it wilts. Add the 1 tbsp of paprika paste and stir until the vegetables are thoroughly coated. Transfer the vegetables to a bowl.

Add the remaining 1 tsp olive oil to the pan. Add the chicken breasts and sauté 4 minutes each side. Remove from pan, and cut into small pieces.
In a small bowl, mix the sour cream, cream cheese, 1 tsp paprika paste, and 1 tsp parsley.
Spray a glass 12x12 baking dish with cooking spray. Put ½ cup of the salsa in the bottom of the dish and spread it to cover. Top with ½ of the ripped tortilla pieces. Then add all of the cooked chicken. Spread the sour cream mixture on top of the chicken layer. Top with the vegetables and the rest of the salsa. Sprinkle half of the cheese on top. Layer on the rest of the tortilla pieces.
Cover with foil and bake for 20 minutes. Bake for 10 more minutes uncovered. Remove from oven and top with remaining cheese and grape tomatoes. Bake for an additional 5 minutes. Garnish with chopped green onion and serve.


I snapped a few different pictures of this dish. First, my ingredients ready to begin the layering process:
Starting from the bottom left, I have my two kinds of cheese (marble and medium cheddar), my ripped tortillas, salsa, seasoned cooked chicken cut into small pieces, sour cream mixture, and sautéed vegetables.

There's the finished product when I took it out of the oven after the entire cooking time. I also snapped a side-on view to catch a sneak-peak into the layers:
Finally it was time to plate the dish and see if my experimentation paid off:
I will admit - it really doesn't look too pretty. But in my defense it's a difficult dish to plate. I can assure you, however, that it was delicious and very filling. As always, I encourage you to make additions, deletions, and/or substitutions. Putting in some black beans or a layer of guacamole would add another dimension of flavour. Or using taco seasoning or lime juice on the vegetables and chicken instead of paprika. This is a versatile dish, and I'm sure that I'll make it in a different way the next time I try it.

Even though this is really not a Mexican or Latin dish, it still put me in the mood for Latin music. I took Latin dance lessons in university with some friends and we had a blast learning all the sensual steps. My favourite was always the salsa because of all the hip action. So my tunes for tonight come from Shakira - Hips Don't Lie.


Sunday, March 24, 2013

Cheese-Stuffed Meatloaf

I didn't go into my kitchen this evening with the intention of making meatloaf. I actually didn't have much of a plan at all. I had the idea of wanting to make some sort of casserole perhaps, and somehow that idea evolved into me creating my first-ever meatloaf. My recipe is a hybrid of my own general knowledge of what meatloaf is from watching endless cooking shows, and from quickly consulting a few of my cookbooks once I got hooked on the thought. Here's how it came together.

Cheese-Stuffed Meatloaf 

1 tsp olive oil
2 cloves garlic, minced
½ red onion, minced

1/3 green pepper and 1/3 other coloured sweet pepper, chopped
6 cremini mushrooms, sliced


½ package extra lean ground beef (about 1 ½ cups)
1 egg
1 tbsp barbecue sauce
1 tsp mustard
2 tbsp tomato paste or thick marinara sauce
½ cup sour cream
1 cup breadcrumbs
1 tsp garlic salt
1 tsp paprika
1 tsp parsley
1 tsp black pepper
½ cup sharp cheddar cheese, grated

Heat the olive oil in a small fry pan over medium-high heat. Add the garlic, onion, peppers, and mushrooms and sauté until soft. Remove from heat and let cool for 5 minutes.


Put ground beef into a large bowl. Add the sautéed vegetables, egg, BBQ sauce, mustard, sour cream, breadcrumbs, and herbs and spices. Bring together using the hands into a sticky mixture. If it appears too wet, add more breadcrumbs.
Line a loaf pan with foil. Spoon a little more than half of the meatloaf mixture into the pan and spread it across the bottom and into all corners. Top with the cheese, mounding it in the middle. Cover the cheese with the rest of the meatloaf mixture and smooth the top so the cheese is no longer visible. Bake in a 375oF oven for 35 minutes.


I had some potatoes on hand, so while the meatloaf was in the oven I whipped up a quick mash. Just to tie the whole dish together, I grated some more of the cheese that I stuffed in the centre of the meatloaf and mashed it in with the potatoes.

And there's the finished product! I got three healthy portions out of this meatloaf. (You could easily get four comfortable portions - I just make bigger portions since I'm the only one eating it). The meatloaf was moist and very flavourful with all of the various ingredients I added in. I kept my meatloaf pretty chunky with large vegetable pieces. If you're not as big on the veggies as I am, chop them up quite finely before sautéing them so they won't be as obvious in the finished loaf. I loved how the cheese oozed out of the meatloaf once I cut it into slices, and the bed of cheesy mashed potatoes brought it all together! Not bad for my very first foray into the world of meatloaf.

So yes, as you may have guessed, I'm going the obviously corny route with my tunes tonight. Since my dish is meatloaf, might as well throw up a Meatloaf tune, even though I'm really not that big of a fan. Just for kicks, here's I Would Do Anything for Love.


Friday, March 15, 2013

Cheesy Zucchini Bake

Zucchini is one of my favourite vegetables to cook with because it's so versatile. I love discovering new ways to use it. I've fried it into zucchini fritters/pancakes, stuffed it with cheese and vegetables, sautéed it into pastas and stir-fries, roasted it for a side or for a sandwich, and now I've baked it. I kept this bake very simple, just letting the zucchini and cheese speak for themselves. You could add other vegetables (mushrooms always play nice with zucchini) or add a condensed soup mix to make into more of a casserole. No matter how you prepare it, this makes a simple and elegant side dish for any meal.


Cheesy Zucchini Bake

1 zucchini, sliced
¼ onion, sliced thinly
1/3 cup breadcrumbs
1/3 cup grated Parmesan cheese
1 tsp olive oil
¼ cup grated cheddar cheese

Preheat the oven to 350oF. Spray bottom of a glass oven-proof circular dish with cooking spray. Arrange the zucchini slices in a circular pattern in the pan, overlapping slightly. After the first layer, spread about ¾ of the onion slices on top. Add the rest of the zucchini slices in a second circular layer, and then top with the remaining onion. Sprinkle with the breadcrumbs and Parmesan, and drizzle the top with olive oil. Bake in the oven for 15 minutes. Remove from oven and top with the grated cheddar cheese. Bake for an additional 5 minutes so the cheese melts.

Here's the zucchini bake just before I put it in the oven for the first time:
It looks quite pretty in the dish laid out in the circular pattern. Yes, this took a bit more time than just throwing the zucchini in there haphazardly, but it makes the presentation that much better!


Here's the finished product after adding the grated cheddar and letting it melt in the oven:
Super cheesy! If you are making this to serve more people and decide to double the recipe and use two zucchini, I would add about 10 minutes to the cooking time to make sure all the layers are fully cooked.


For the beats, I'm bending the title of this song slightly to make it fit my message. I think this dish could make anyone try and enjoy zucchini (mostly because of all the cheese), even if they're quite reluctant. In other words, it could cause you to make an exception to your dislike of this glorious vegetable. In honour of that idea (and because I recently ordered the sheet music to this song and can't stop playing it on my piano), here is The Only Exception by Paramore.


Friday, February 08, 2013

Homemade Nachos

Sometimes we all need to indulge in unhealthy treats. Oftentimes this indulgence occurs while eating out, but lately I've been trying to replicate some of my favourite restaurant meals at home to have more control over the ingredients and to feel a little better about eating something more on the unhealthy side. My roommate in teacher's college is the one who introduced me to the idea of making nachos at home, and it became one of our staple meals that year. They're fun to create together and to eat together, and if you add lots of vegetables and use extra lean ground beef (or even ground turkey or chicken) then you can feel a little less guilty about the indulgence.

Homemade Nachos

2 cups whole grain tortilla chips
1 cup extra lean ground beef
1 clove garlic, minced
1/4 onion, minced
1/2 bell pepper, chopped in small chunks (or 1/4 of 2 different coloured bell peppers)
3 mushrooms, chopped in small chunks
1/2 cup grated cheese
sour cream and salsa for dipping

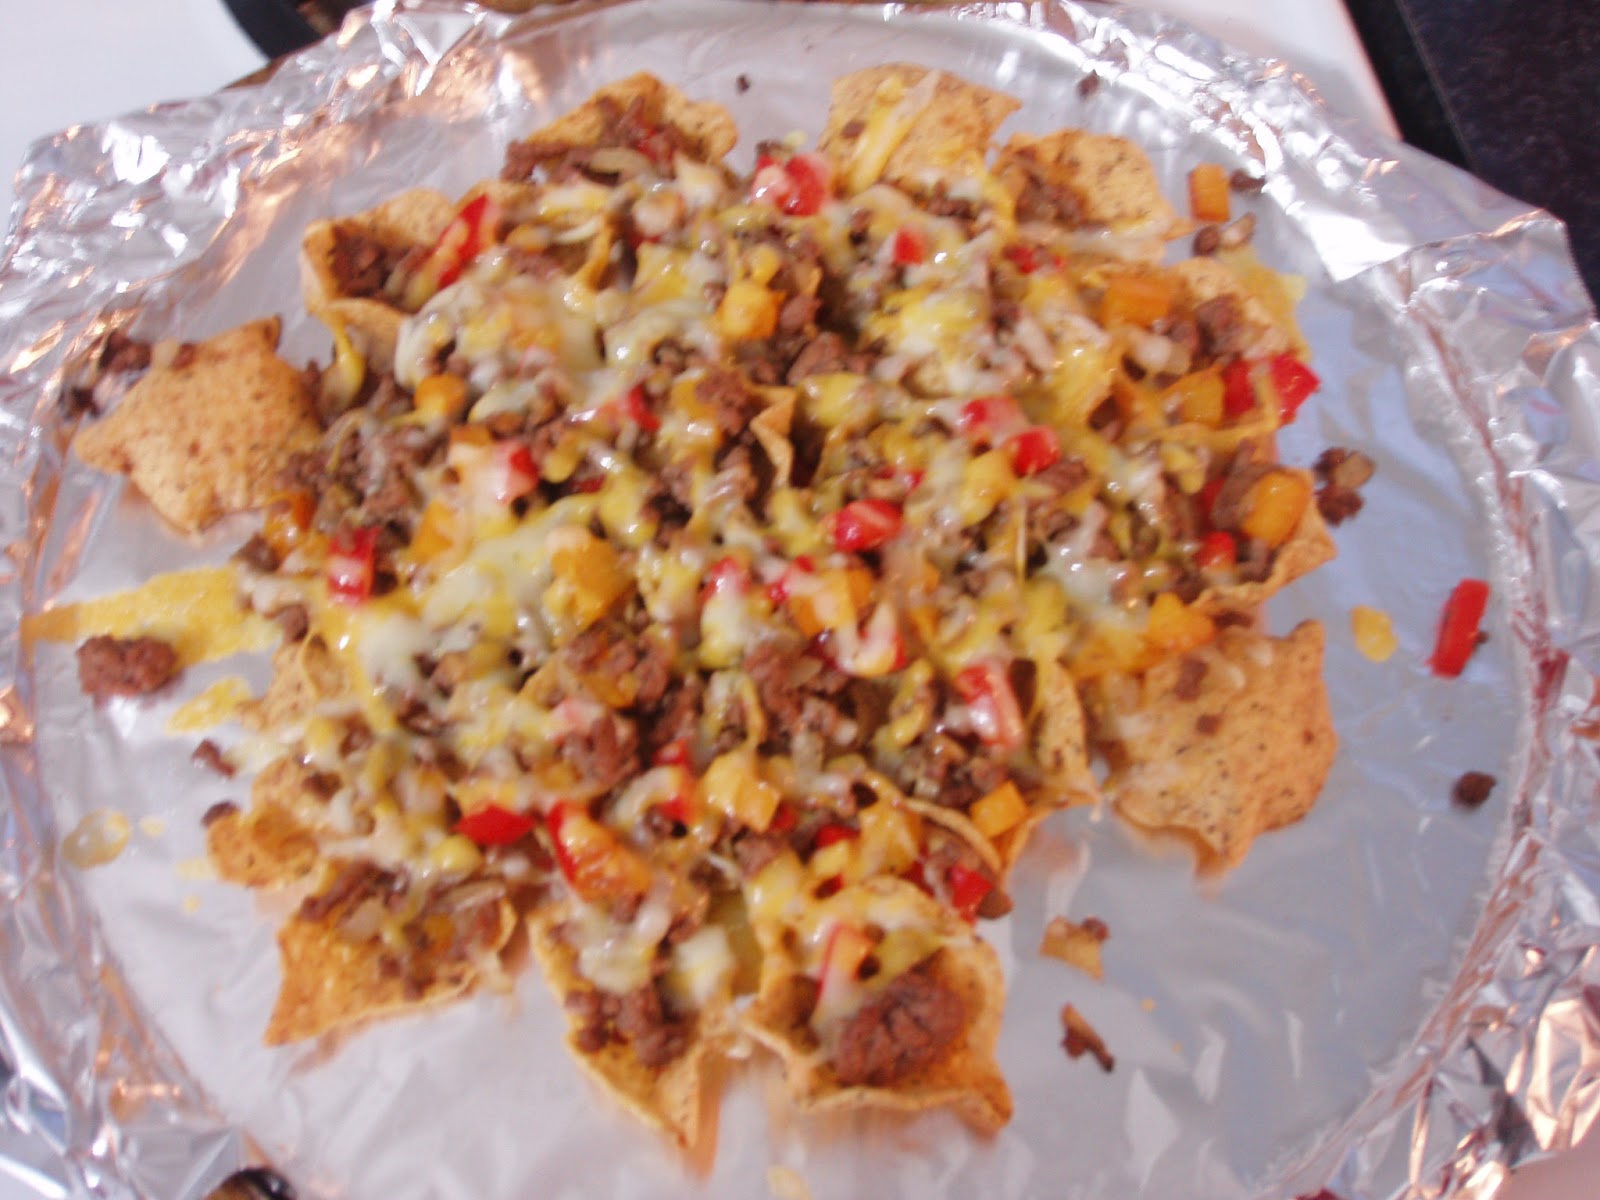
Heat oven to 350F. Line a baking sheet with aluminum foil (this is a huge help for clean-up at the end). Spread the chips out on the baking sheet in an even layer with chips overlapping each other a bit. Place the baking sheet in the oven and pre-crisp the chips for 5 minutes. (This step ensures that you do not end up with soggy nachos).
While the chips are in the oven, heat a few drops of olive oil in a pan over medium-high heat. Add the vegetables and sauté for 3 minutes. Add the beef and sauté until no longer pink. If you want a spicier nacho, you could add some taco seasoning or other spices to the beef at this point. My old roommate and I are both not friends with spicy foods, so we keep our nachos pretty plain.
Remove the beef and vegetables from the heat and drain off some of the fat. (This again helps to stop soggy nachos). Take the chips out of the oven, and top with the beef and vegetables, and then sprinkle the grated cheese all over top. Use whatever cheese you like - Cheddar, Marble, Monterey Jack, etc. Put the pan of nachos back in the oven for about 5 minutes (just until the cheese melts). Serve with salsa and sour cream.


There's two views of my glorious nachos! This pan feeds two in my experience and the nachos are pretty fully loaded! It's easiest to just eat them right off the pan. Once you're done, just roll up the foil and toss in the garbage - no need to scrape melted cheese off of the pan.

Since this post has allowed me to reminisce about my teacher's college days, my beats are an homage to that year with our theme song at the time. I can't recall now all the details of how this song came to define our year, but I know we heard it all the time, and we even had a sweet dance move to go with the refrain in the chorus. I'm slightly embarrassed to admit my fondness for this song, but here you have Whatever You Like by T.I.


Saturday, January 05, 2013

Weekend Lunch: Pita Pizza

I decided to make my first ever attempt at homemade pizza today for lunch. I had all the necessary ingredients - tomato sauce, vegetables, mozzarella cheese - and I had bought pitas this morning at the grocery store which would make a perfect crust. I'll type out my recipe as I made my pizza today, but pizza is such a highly personal culinary treat, which makes it quite unique. Everyone has their own perfect topping combination, so what worked for me today might not work for you. I encourage you to take the idea behind this pita pizza and accessorize it with your own favourite toppings! Finally, my pizza ended up being monstrous - I had a little too much of each topping for just one pita. The measurements in the recipe to follow would make 2-3 pita pizzas, unless you enjoy a crazy pizza like me.

Pita Pizza

one whole grain pita (but really 2-3...my eyes were larger than the pita)
3-4 tbsp tomato sauce
1/2 cup mozzarella cheese
1/4 cup pineapple chunks
1/4 cup mushrooms, chopped
1/4 cup green pepper, chopped
1/4 cup grape tomatoes, halved
1/4 cup chicken breast, seasoned and sautéed
1/4 cup onion, chopped
3 tbsp parmesan cheese

Preheat the oven to 375F. Lightly spray a pan and place the pita on the baking pan. Put in oven for 5 minutes to pre-crisp. While the pita is crisping, chop the vegetables and sauté the chicken breast. Here's my layout of toppings eagerly awaiting their pita crust:


Take the baking pan out of the oven. Add the tomato sauce to the pita and spread out with the back of a spoon. Sprinkle with 1/4 cup of the mozarella cheese. Add the desired toppings. Top with the other 1/4 cup mozarella cheese and sprinkle with the parmesan cheese. Place back in oven for 10-15 minutes, depending on desired crispness.

And here's my finished product:


So I know, I went a little overboard, but I had already chopped all the vegetables, so I had to use them. Despite being piled ridiculously high, this pizza was delicious, and relatively healthy, as far as pizzas go. This would be a great recipe to make with kids as everyone can personalize their own pita pizza.

I need some fun beats to accompany this pizza, so I picked a song that I love to belt out just about anywhere - the car, the kitchen, at a party with friends. Just like this pizza that suits any occasion and fulfilled my afternoon hunger, this song is a surefire selection to get me pumped up and fulfill my need to sing and dance - Mr. Brightside by the Killers.